Following up on the tutorial on Node/Express servers, this tutorial shows how to connect to MySQL (or MariaDB) with Node.js and Express.
This tutorial assumes that you already know how to create and connect to a MySQL (or MariaDB) database through the command line or another method (PHP, MySQL Workbench, etc.).
Tip: work through the other tutorial first if you aren’t familiar with how Node servers work.
This tutorial will use raw SQL. If you’re looking for a query builder or ORM to use with Node, look into Knex, Bookshelf, Sequelize, or Objection.
I’m using some ES6 syntax in the examples. If anything doesn’t make sense, leave a comment below, and I’ll write another tutorial. 
Initializing the App
Set Up the Database
Make a new project folder for your app and add a file named .gitignore with these contents:
.env
node_modules/
There will be a file named .env that contains your secret password, so you want to be sure that it doesn’t get published to a hosting service like Github or Gitlab. The .gitignore file prevents you from accidentally uploading your passwords to a public server.
Then create a file called .env and put your secret database connection settings in it:
MYSQL_HOST=localhost
MYSQL_USER=your_mysql_username
MYSQL_PASSWORD=your_mysql_password
MYSQL_DB=mysql_node
If you don’t already have a database to experiment with, create a new database named mysql_node and run the following SQL on it:
CREATE DATABASE IF NOT EXISTS mysql_node;
use mysql_node;

CREATE TABLE `monsters` (
    `id` int(11) NOT NULL AUTO_INCREMENT,
    `name` varchar(100) NOT NULL,
    `hit_points` int(11) NOT NULL,
    `favorite_food` varchar(100) NOT NULL,
    PRIMARY KEY (`id`)
) ENGINE=InnoDB AUTO_INCREMENT=4 DEFAULT CHARSET=utf8mb4;

INSERT INTO `monsters` VALUES (1,'beholder',189,'halflings'),(2,'dragon',300,'humans'),(3,'goblin',6,'slime');
It’s a simple database with three items, but it should be enough for a quick example:
MariaDB [mysql_node]> select * from monsters;
+----+----------+------------+---------------+
| id | name     | hit_points | favorite_food |
+----+----------+------------+---------------+
|  1 | beholder |        189 | halflings     |
|  2 | dragon   |        300 | humans        |
|  3 | goblin   |          6 | slime         |
+----+----------+------------+---------------+
3 rows in set (0.00 sec)
Install Dependencies
Then generate a package.json file by typing:
$ npm init -y
You can open the package.json file and change any settings you want, but the defaults are fine for this tutorial.
Then install three node packages from NPM:
$ npm install --save mysql dotenv
$ npm install --save-dev nodemon
The mysql and dotenv packages are main dependencies that will always be included in your project, and the nodemon package will only be downloaded in development environments.
What Just Happened
If you look in your project directory, you will see a node_modules directory that holds those three packages, and your package.json file will automatically update with the dependencies. Your file will look a little different, but here is my package.json file for comparison:
{
    "name": "@j127/mysql_node",
    "version": "0.1.0",
    "description": "How to connect to MySQL/MariaDB from Node",
    "main": "app.js",
    "scripts": {
        "test": "echo \"Error: no test specified\" && exit 1"
    },
    "keywords": [],
    "license": "BSD-3-Clause",
    "dependencies": {
        "dotenv": "^8.2.0",
        "mysql": "^2.18.1"
    },
    "devDependencies": {
        "nodemon": "^2.0.3"
    }
}
There will also be a new package-lock.json file there, but you can ignore that file in most cases.
Create the Start Script
Change the scripts section of the package.json file from this:
    "scripts": {
        "test": "echo \"Error: no test specified\" && exit 1"
    },
to this:
    "scripts": {
        "start": "nodemon app.js"
    },
That will let you start your app by typing npm start.
Create the App
Create a file named app.js and put the following code in it:
// This loads the settings from your `.env` file.
require("dotenv").config();

// This makes sure you can read your .env file
const host = process.env.MYSQL_HOST;
const database = process.env.MYSQL_DB;

console.log(`connecting to database ${database} on ${host}`);
You can now try running your app to see if everything is wired together correctly. Type npm start and check for the output of console.log:
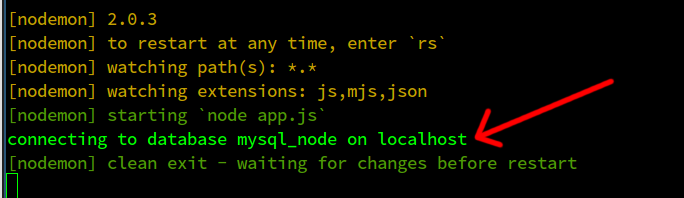
That doesn’t connect to the database yet, but just makes sure that your program can read your database settings.
The line that says require("dotenv").config() loads the key-value pairs from your .env file and makes them available as environment variables while the app is running.
In Node you can access environment variables with this syntax:
process.env.NAME_OF_ENVIRONMENT_VARIABLE
So to access the environment variabled named MYSQL_HOST that was defined in your .env file, you can write this in your JavaScript:
const host = process.env.MYSQL_HOST;
Connect to the Database
Once everything above is working, you can try connecting your program to the actual database.
Add a line near the top to import the mysql library that was downloaded with npm. You don’t need to log the environment variables any more, so your app.js file should now look like this:
require("dotenv").config();

// This imports the mysql library
const mysql = require("mysql");
Add some code to connect to the database. The app.js file should look like this:
require("dotenv").config();
const mysql = require("mysql");

// Prepare to connect to MySQL with your secret environment variables
const connection = mysql.createConnection({
    host: process.env.MYSQL,
    user: process.env.MYSQL_USER,
    password: process.env.MYSQL_PASSWORD,
    database: process.env.MYSQL_DB,
});

// Make the connection
connection.connect(function (err) {
    // Check if there is a connection error
    if (err) {
        console.log("connection error", err.stack);
        return;
    }

    // If there was no error, print this message
    console.log(`connected to database`);
});
Run npm start (if it isn’t already running) and you should see the message “connected to database” in your terminal.
Now you can make a query. Here’s an example:
const sql = "SELECT * FROM monsters";
connection.query(sql, function (err, results, fields) {
    if (err) throw err;

    console.log("here are your results", results);
});

connection.end();
After saving the file you should see the data printed in the console something like this:

Reusable Functions
The example below uses JavaScript promises. If you aren’t familiar with promises, they are a kind of thing that “promises” to send you a result (resolve) or an error (reject) whenever it’s done. You can get the result of the promise by attaching .then() to the end. You can get the error by attaching .catch() to the end.
// This loads the settings from your `.env` file.
require("dotenv").config();

// This imports the mysql library
const mysql = require("mysql");

// Prepare to connect to MySQL with your secret environment variables
const connection = mysql.createConnection({
    connectionLimit: 10,
    host: process.env.MYSQL,
    user: process.env.MYSQL_USER,
    password: process.env.MYSQL_PASSWORD,
    database: process.env.MYSQL_DB,
});

// Make the connection
connection.connect(function (err) {
    if (err) {
        console.log("connection error", err.stack);
        return;
    }

    console.log(`connected to database`);
});

// This wraps up the query in a function and returns a promise. It
// "resolves" the results if the database query is okay, and "rejects"
// (errors) if something goes wrong.
function getAllMonsters(limit = 100) {
    return new Promise((resolve, reject) => {
        // This question mark syntax will be explained below.
        const sql = `SELECT * FROM monsters LIMIT ?`;
        connection.query(sql, [limit], function (err, results, fields) {
            if (err) {
                return reject(err);
            }

            return resolve(results);
        });
    });
}

// Run the function using `then` to get the results, and
// `catch` to get any errors.
getAllMonsters()
    .then(data => console.log("all monsters", data))
    .catch(err => console.error(err));
If you run that, the database items should still print out in the console, but now you can reuse the function.
You could write getAllItems(2) to limit the query to 2 results instead of the default 100 results.
Try adding another function at the bottom to get just one monster by its ID:
// WARNING: Pay attention to the question mark syntax
function getMonsterById(id) {
    return new Promise((resolve, reject) => {
        const sql = "SELECT * FROM monsters WHERE id = ?";
        connection.query(sql, [id], function (err, results, fields) {
            if (err) {
                return reject(err);
            }

            return resolve(results);
        });
    });
}

// run the function, looking up a monster by ID
getMonsterById(2)
    .then(data => console.log("monster #2", data))
    .catch(err => console.error(err));
You should see monster #2 printed in the terminal.
This code that gets the data from MySQL is separated from the code that serves webpages, so you can use it in multiple places if you need to, like sending emails or creating local reports. Any JS module that needs to find a monster by ID could just import that function and run getMonsterById(2) to fetch the data.
SECURITY WARNING
The ? syntax in the SQL is a security feature that sanitizes user input. If you don’t write the queries this way, it will open up security holes.
const sql = "SELECT * FROM monsters WHERE id = ?";
The ? gets filled with the next function parameter on the connection.query method. So each item in the array there (just [id] in this example) will fill in one question mark placeholder, sanitizing the input in the process.
const sql = "SELECT * FROM monsters WHERE id = ?";
connection.query(sql, [id], function (err, results, fields) {
// ...
The question mark helps reduce the chance that Little Bobby Tables will visit.
If this part doesn’t make sense, leave a comment below, because it’s important not to miss that for security reasons.
The version of the code up to this point is on Github as release v0.1.0. You can also find the code above by checking out the simple-node-example branch.
Using Express
Install Express.js in the project with this command:
$ npm install --save express
Create a new file in a new directory at ./db/database.js with these contents:
// This imports the mysql library
const mysql = require("mysql");

const pool = mysql.createPool({
    connectionLimit: 10,
    host: process.env.MYSQL,
    user: process.env.MYSQL_USER,
    password: process.env.MYSQL_PASSWORD,
    database: process.env.MYSQL_DB,
});
It’s similar to the code we wrote before, but this time it uses pool instead of connection. That will let the library manage the database connections.
Then put the code we wrote earlier in the db/database.js file. Here is the file on Github for reference:
Then replace all of the code in the app.js file with a simple Express server.
For example, to create a route at localhost:3333/api that gets all the monsters from the database, you could do this:
app.get("/api", (req, res) => {
    db.getAllMonsters()
        .then(data => res.json(data)) // if successful
        .catch(err => res.status(500).json(err)); // if error
});
To get one monster by its ID at a URL like `localhost:3333/api/2, you could do something like this:
// get a monster by ID (1, 2, or 3)
app.get("/api/:id", (req, res) => {
    // extract the :id parameter from the URL
    const id = req.params.id;

    db.getMonsterById(id)
        .then(data => {
            if (data.length > 0) {
                console.log("data", data);
                res.json(data);
            } else {
                res.status(404).json({ message: "Not Found" });
            }
        })
        .catch(err => res.status(500).json(error));
});
Here is a complete example of an app.js file that also includes a route to search the database by monster name:
You can clone the repo and run it to see a working example. The instructions are in the README.md file.
Learning More
This tutorial is meant to be a quickstart overview. If anything doesn’t make sense or if more examples would help (or if you notice any problems/errors), leave a comment below.
The docs for the mysql NPM package are also worth checking out.


