This is a quick tutorial on how to send emails with Node.js and Mailgun. The general instructions are similar for any transactional email provider.
A transactional email service sends emails for you and bills you a small amount per email. I used Mailgun as an example here, because it’s free for up to 10,000 emails per month, and it’s what this forum uses to send emails. Sorry, Mailgun is no longer free after a free trial. See this comment below for a discussion about various options. If you understand how to send transactional emails with Mailgun, the process is almost the same for other transactional email providers.
Creating the Application
Create a new project folder with a file named package.json. It should have this content:
{
    "name": "node_email",
    "version": "0.1.0",
    "description": "A quick example on how to send emails with Node.js",
    "main": "app.js",
    "scripts": {
        "start": "node app.js"
    },
    "license": "BSD-3-Clause"
}
The package.json file holds information about your program, including the libraries it depends on.
After saving that file, run these commands in a terminal from your project directory:
$ npm install --save mailgun-js dotenv html-to-text
The package.json file will automatically update to look something like this, though the version numbers might be different.
"dependencies": {
    "dotenv": "^8.2.0",
    "html-to-text": "^5.1.1",
    "mailgun-js": "^0.22.0"
}
The mailgun-js package has code to interact with Mailgun’s email service, html-to-text will allow us to send text versions of the emails, and dotenv is a package that protects the secret API keys.
Protect Your API Key
Create a .gitignore file in your project folder with this text:
.env
node_modules/
That will help you keep your secret API keys from accidentally being pushed to Github or Gitlab.
Create a Mailgun Account
Head over to mailgun.com and create a free account.
Mailgun is a transactional email service, which means that it programmatically sends emails for you with an API. You can send up to 10,000 free emails per month. Mailgun no longer has free emails, but there is a free trial that you can use to at least learn how to send emails with Node.js.
I used to send emails directly from the servers where I hosted my sites until the emails started bouncing. One of the new servers I had deployed had previously been used by a spammer, so its IP address was blocked by a lot of email companies. The only way I could fix it and get my email delivered was to use an external service to send the emails.
After you create the Mailgun account, follow all of their instructions and get an API key from the homepage of your Mailgun dashboard.
Create a .env file
Copy the file .env-example to .env and add your Mailgun settings. I left instructions in the .env-example file. A .env file allows your application to read secret passwords and API keys while keeping them out of your Git repo. If you put the secrets directly in the code, it creates security risks.
# copy this file to .env and add your API key
MAILGUN_API_KEY=

# This is the domain you verified with Mailgun
DOMAIN=mailer.example.com

# This is the sender address for your emails. You can override it when
# you send emails.
DEFAULT_FROM_EMAIL=

# This is an email address where you want to send the test email
TEST_EMAIL_ADDRESS=
Each of those fields will then be available to Node.js programs by using process.env.SECRET_KEY_NAME (explained below).
Adding the Code
Start an app.js file with the following code. Read the comments to see what each line does.
// This loads the environment variables in your .env file
require("dotenv").config();

// Load the code for interacting with Mailgun's API
const Mailgun = require("mailgun-js");

// This library will help create a text version of the HTML email
const htmlToText = require("html-to-text");

// This fetches an environment variable, which is hidden in your .env file.
const MAILGUN_API_KEY = process.env.MAILGUN_API_KEY;

// This is the domain that you verified in Mailgun during account creation
const DOMAIN = process.env.DOMAIN;

// These two lines will help you send test emails
const TEST_EMAIL_ADDRESS = process.env.TEST_EMAIL_ADDRESS;
const DEFAULT_FROM_EMAIL = process.env.DEFAULT_FROM_EMAIL;
Below that, create a function to send emails:
// Pass in the email information
function sendEmail(toEmail, subject, html, fromEmail = DEFAULT_FROM_EMAIL) {
    // This makes a plain text email from your HTML version.
    const textVersion = htmlToText.fromString(html, { wordwrap: 78 });

    // This is the data you will send to Mailgun
    const payload = {
        from: fromEmail,
        to: toEmail,
        subject: subject,
        html: html,
        text: textVersion,
    };

    // Preview the payload here if you want
    console.log(payload);
}
Right below that, create a function to send a test email:
function sendTestEmail() {
    // When you call the function, you give it the HTML to send.
    const bodyHtml = `
        <h1>Hello World</h1>
        <p>Here is your test email.</p>
        <p><img src="https://placekitten.com/300/300" alt="placekitten image" /></p>
        <ul>
            <li>item 1</li>
            <li>item 2</li>
            <li>item 3</li>
        </ul>
        <p>Here's <a href="https://example.com/">a link</a>.</p>
    `.trim();

    // Run the sendEmail function above
    sendEmail(TEST_EMAIL_ADDRESS, "Hello World", bodyHtml);
}

// Run the function
sendTestEmail();
Run the code by typing node app.js or npm start. It doesn’t send an email yet, but it should print out the data that you will send to Mailgun. On my computer, it looks like this.

Sending the Data to Mailgun
Put this code right before the sendEmail function:
const mailgun = new Mailgun({ apiKey: MAILGUN_API_KEY, domain: DOMAIN });
and add code to the sendEmail function so it looks like this:
function sendEmail(toEmail, subject, html, fromEmail = DEFAULT_FROM_EMAIL) {
    const textVersion = htmlToText.fromString(html, { wordwrap: 78 });

    const payload = {
        from: fromEmail,
        to: toEmail,
        subject: subject,
        html: html,
        text: textVersion,
    };

    // You can preview the payload here if you want
    console.log(payload);

    // This part does the email sending
    mailgun.messages().send(payload, (err, _body) => {
        if (err) {
            console.error("ERROR", err);
        } else {
            console.log(`Sent email to ${toEmail}`);
        }
    });
}
Run the program again with npm start and it should send you an email from Mailgun’s servers.
Here’s a screenshot of the sample HTML email in Thunderbird.
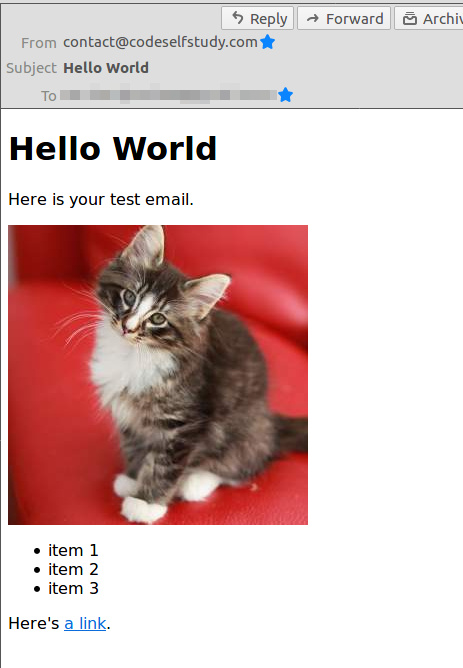
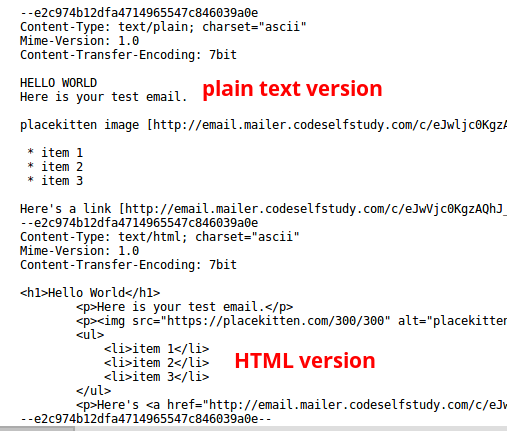
If you view the email source code (ctrl-u in Thunderbird), you will be able to see that both plain text and HTML versions of the email were delivered.
Give it a try, and if anything doesn’t work, leave a comment below.
Learn More
The finished sample code is on Github.
I recommend typing out all the code above. If something doesn’t work, clone my repo and tinker with it to see how it works. Let me know if you have other questions.
Also check out this example to learn about some of the other features, like sending file attachments and adding people to mailing lists.
Edit: see also Sending Emails with Amazon SES